|
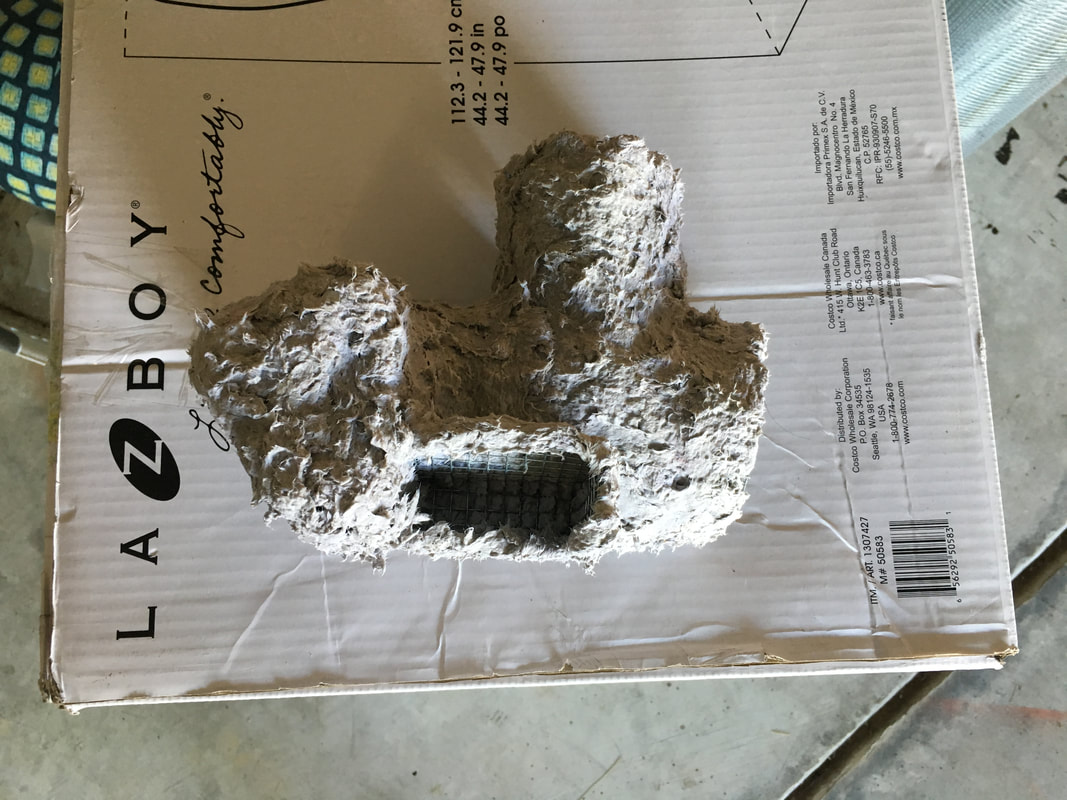
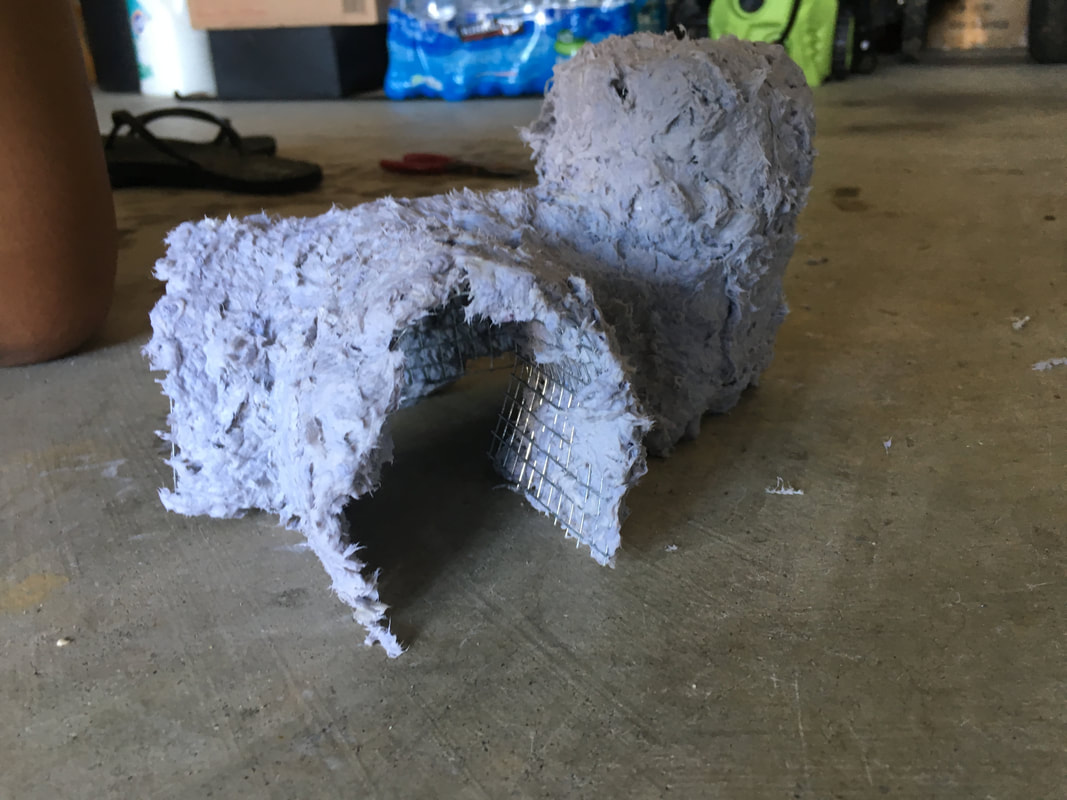
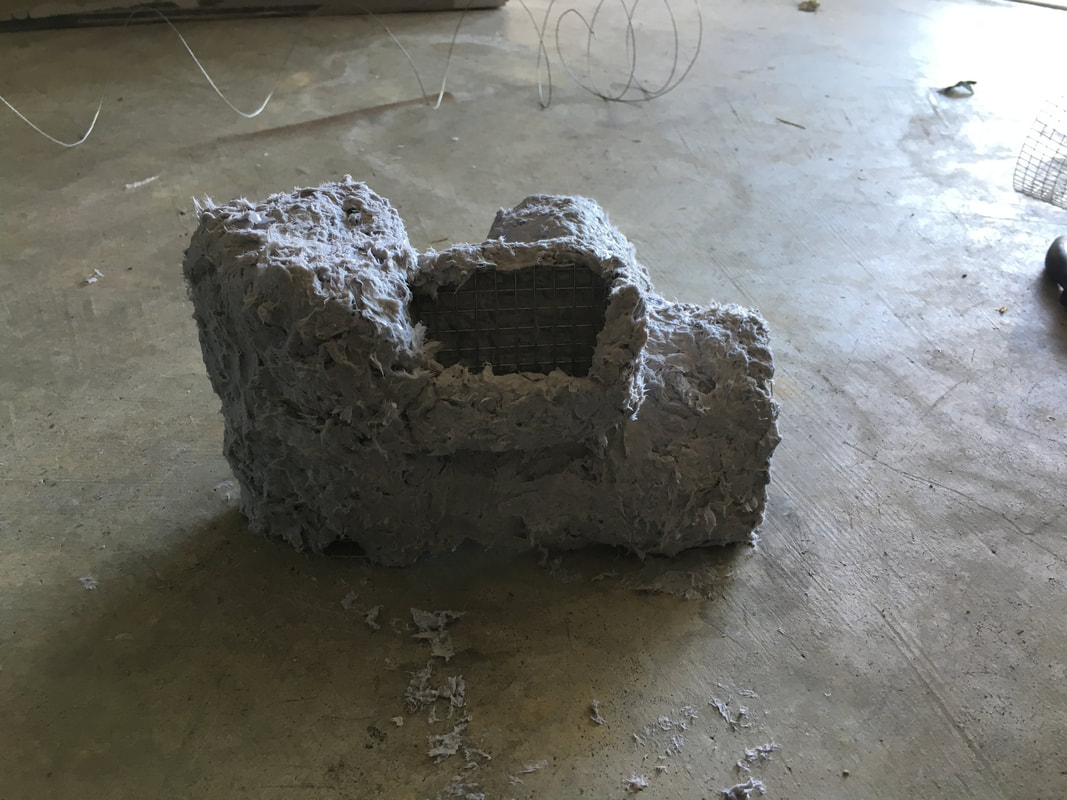
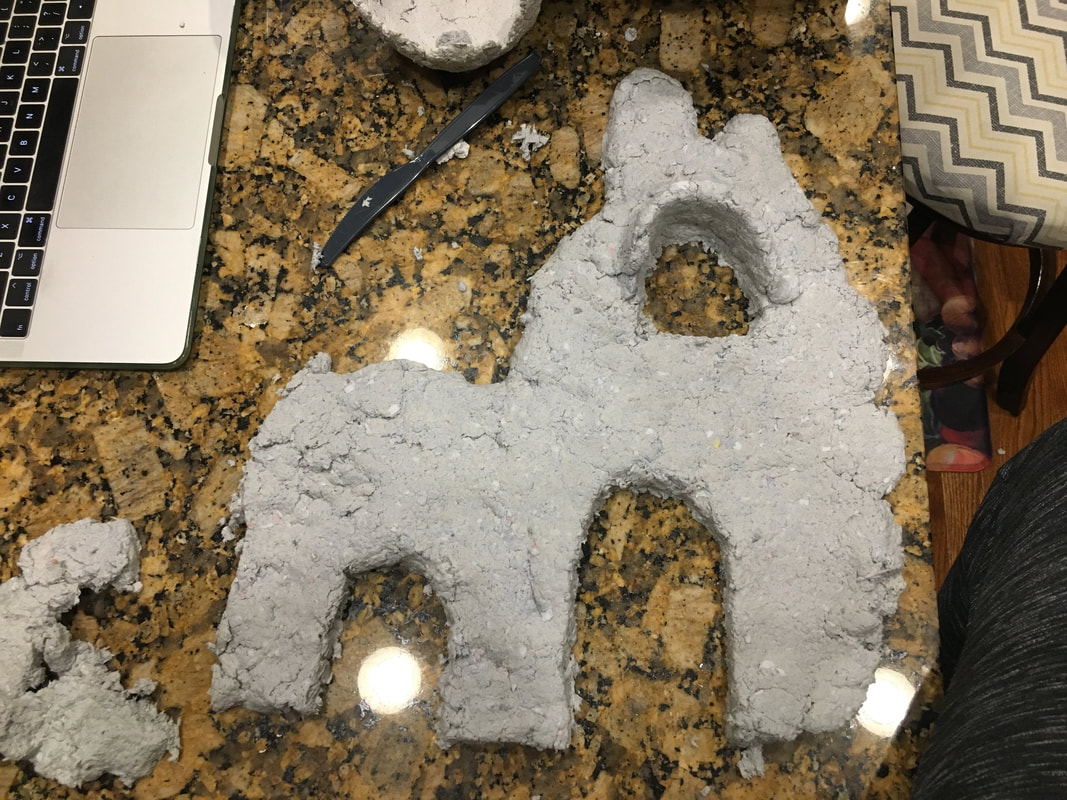
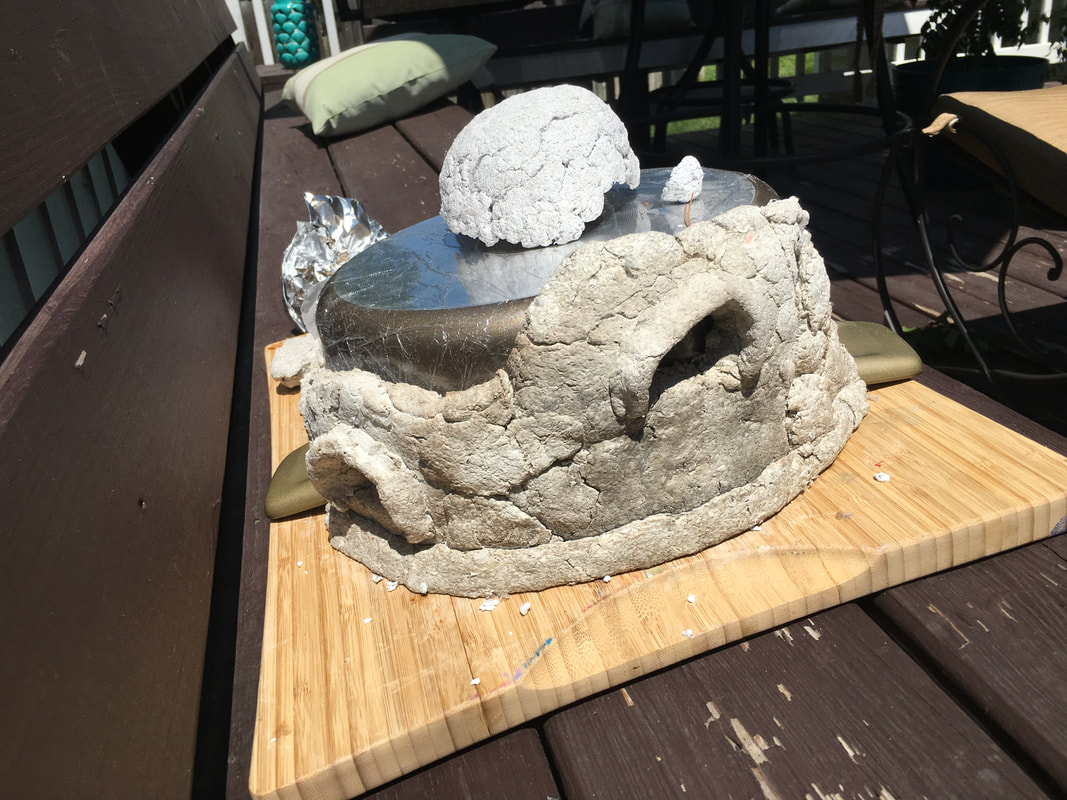
The piece finally dried! It's less sturdy than I expected it to be, but I'm honestly just glad that it stands on its own. I'm not gonna lie; its pretty ugly. But! It is much closer to my inspiration pics than I expected to get. Even though it doesn't look like it, this took so long to complete and I still haven't finished figuring out what the right proportions really are for the clay. I think with this batch I may have added too much cornstarch, which is what made it too sticky. I think if I had mixed the two recipes together from the get-go, I may have gotten more of a clay material. Maybe I'll give it one more shot someday. I do like the concept behind the piece and my original idea that stemmed from the ruins I saw in Italy, but there must be an easier to make material that I can use instead. the completed piece
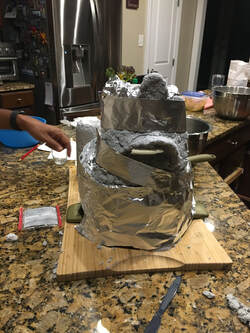
0 Comments
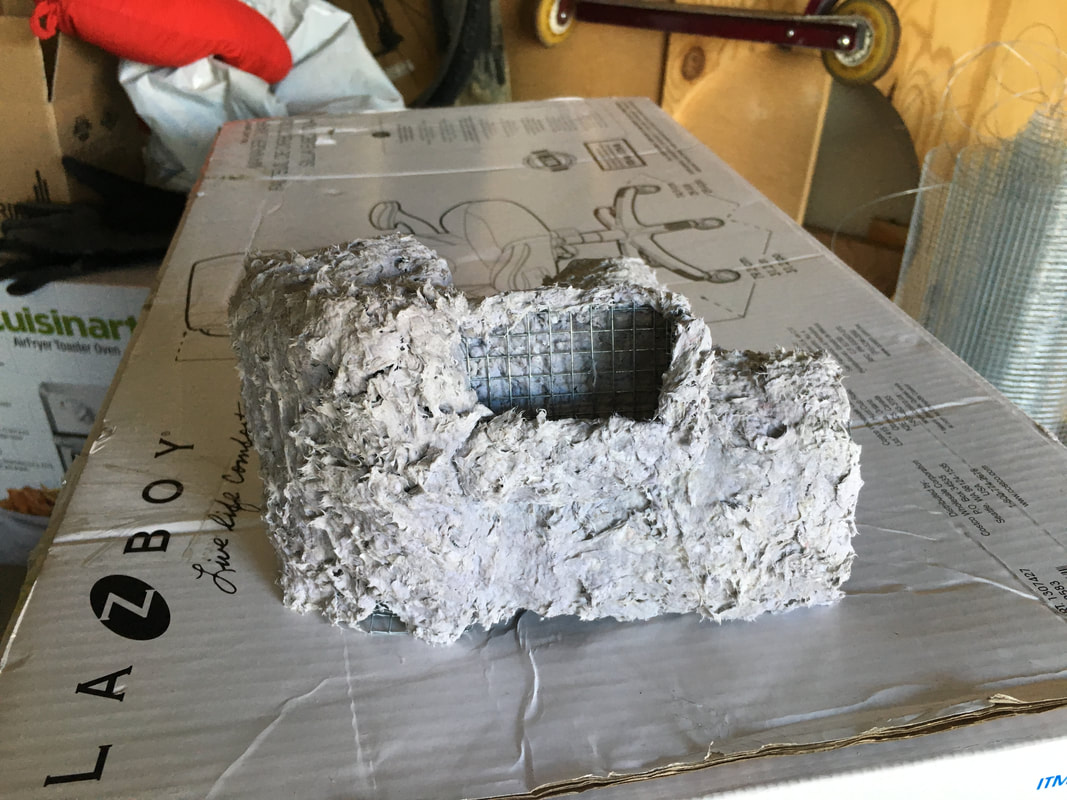
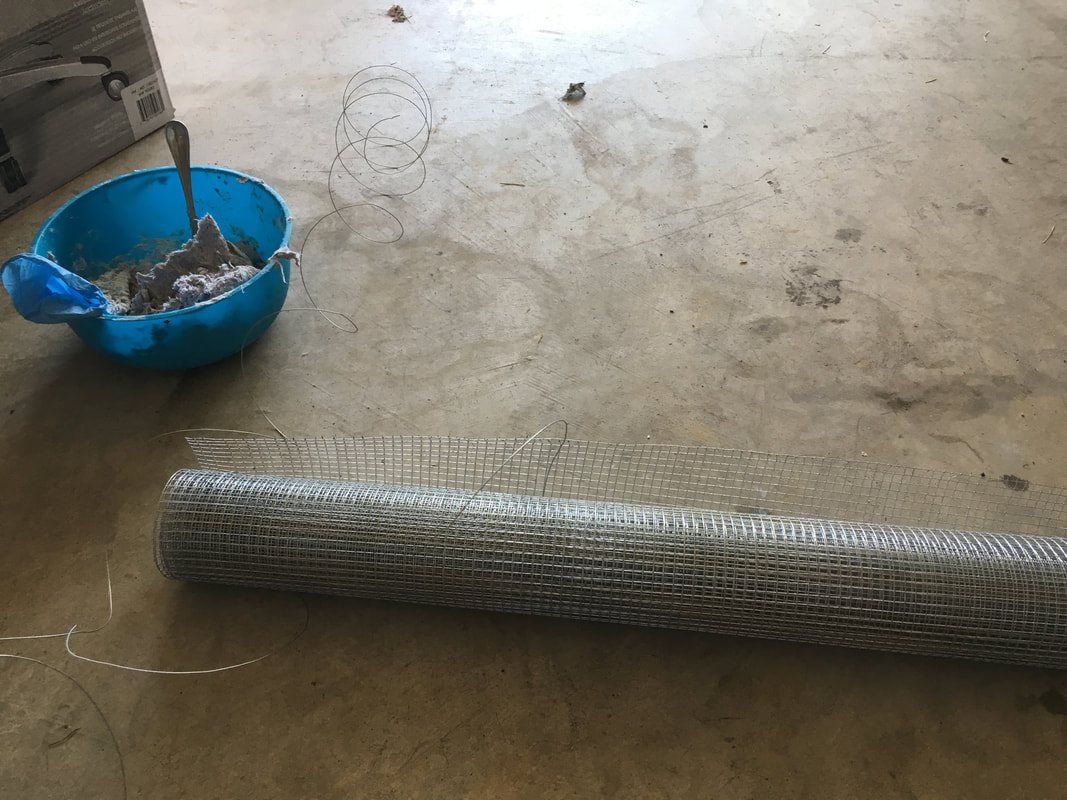
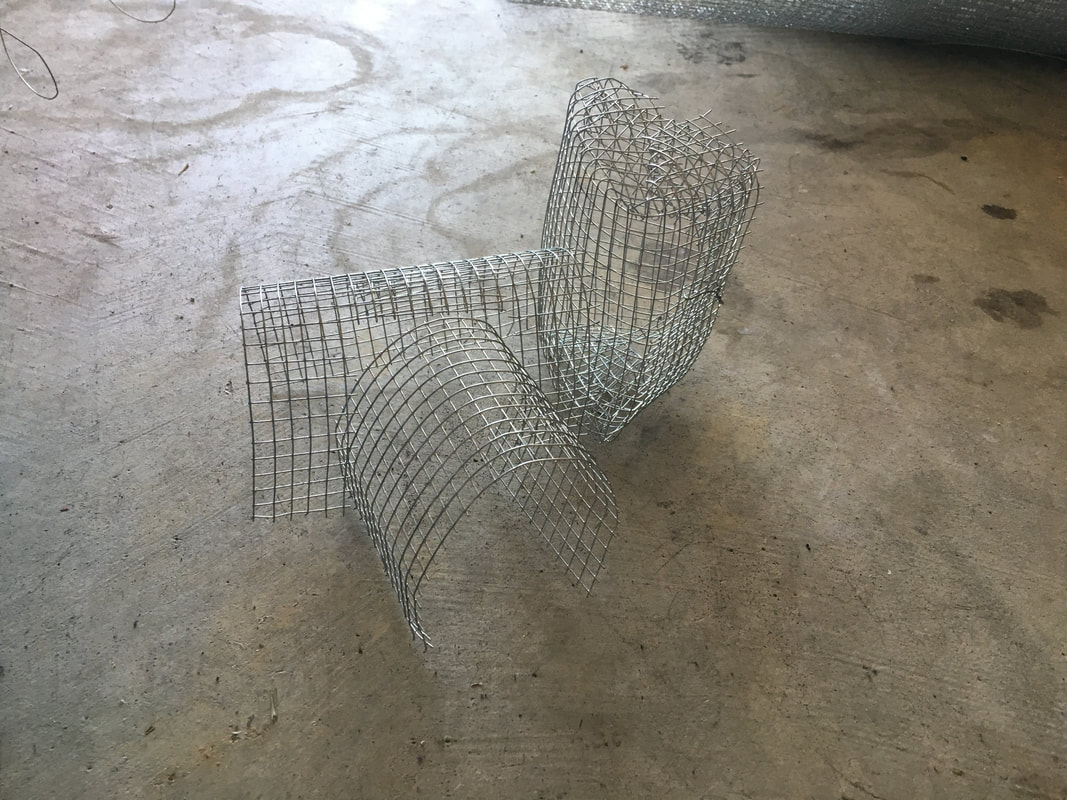
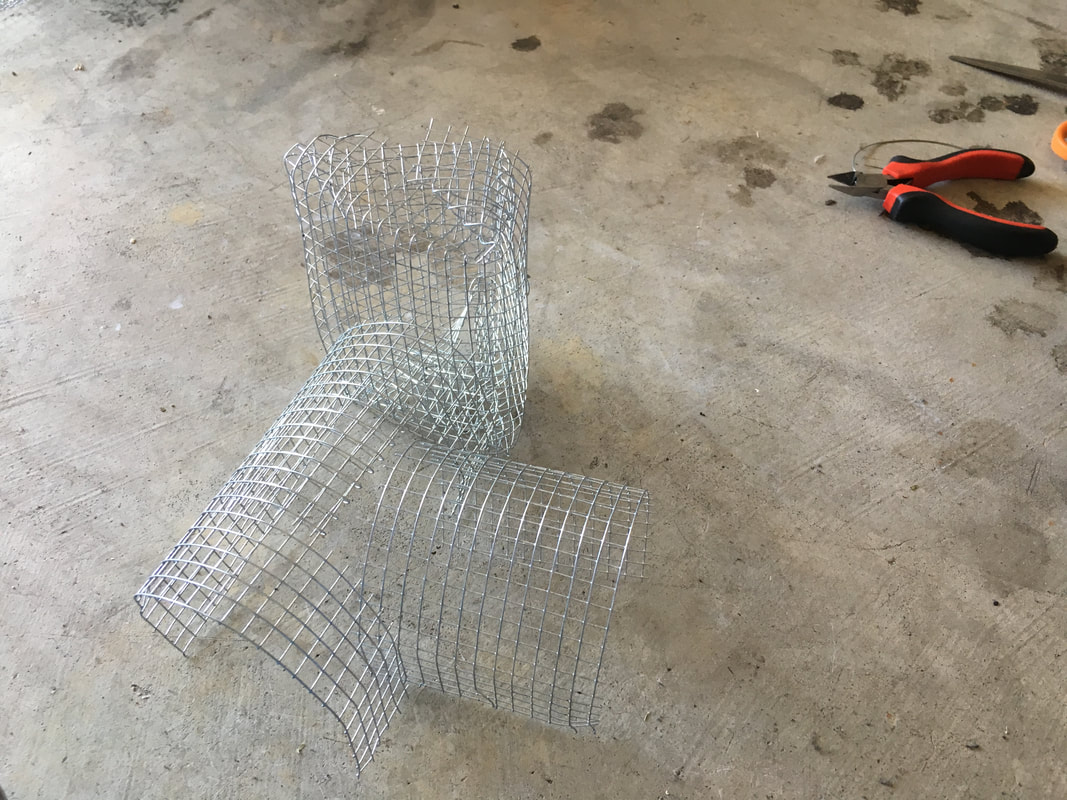
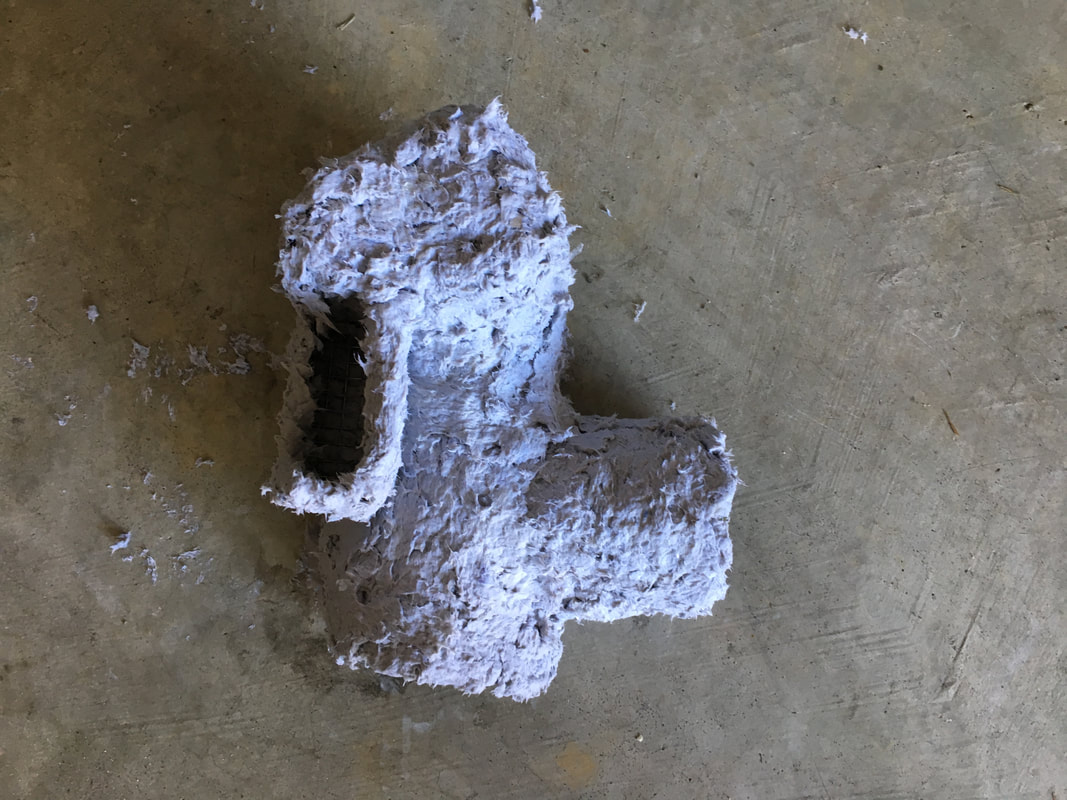
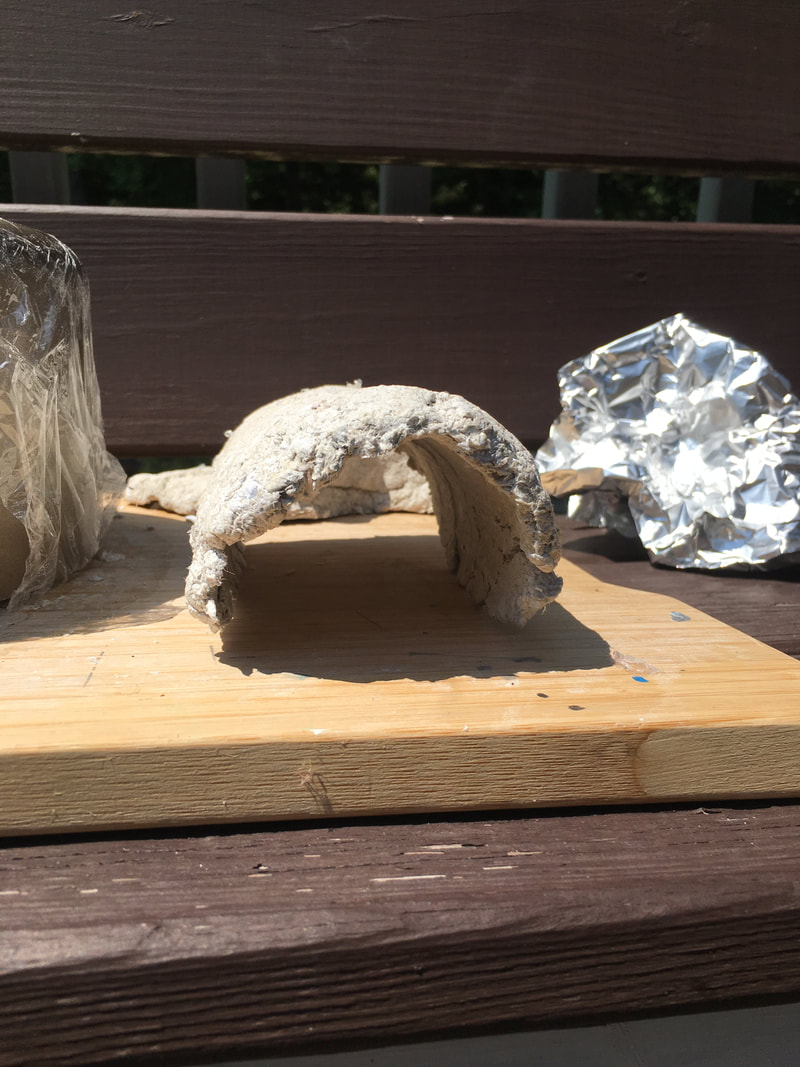
This morning I added more paper bits to the liquidy "clay" I had from yesterday to try and get a better consistency, but it didn't work. In a last attempt to salvage the clay I added flour to it, essentially combining the first recipe I tried and the second, but to no avail. I decided to call it quits on my original idea (for now) and headed to Lowe's to get some wire mesh. I didn't end up finding the same gauge and type of wire mesh that I used at school for my last sculpture, but what I found was pretty workable. I made an armature out of the wire that had most of the main components I originally had in my sketch- an arch, a large box-like compartment, and a floating balcony. The consistency of the "clay" which I should honestly call slop at this point was still really sticky, and I had a tough time getting it to get off my fingers and make it stick to the wire. The end result is completely not what I was going for, since it looks kind of like a mudslide in the form of a sculpture, but!!! I am going to be very very happy if it dried properly and becomes an actual piece I can pick up. In the future I want to go back and try the first recipe of paper clay I had found, because I really loved the texture of the test run bowl I had made. I wonder if the heat that the second piece dried in is what made the made the clay fall apart. Anyways, I hope when this piece dries it at least has an interesting texture to it. wire armature
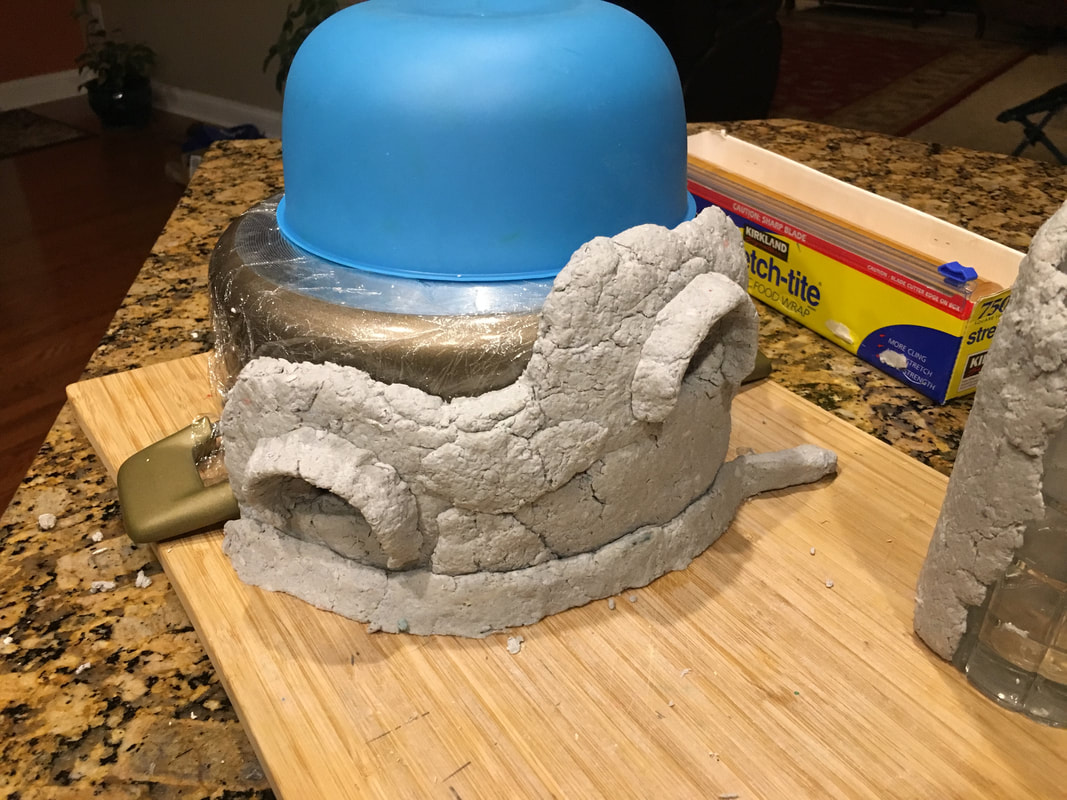
the wet piece
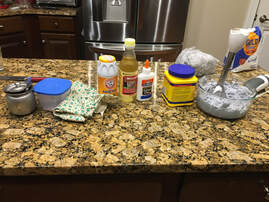
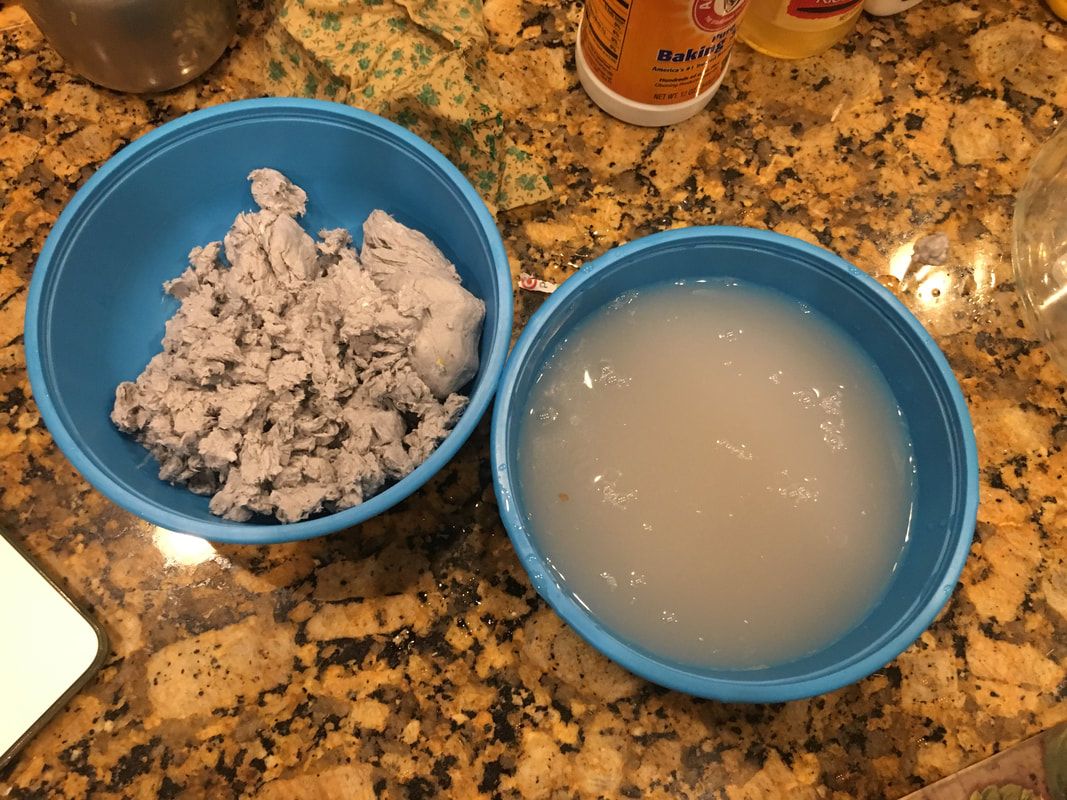
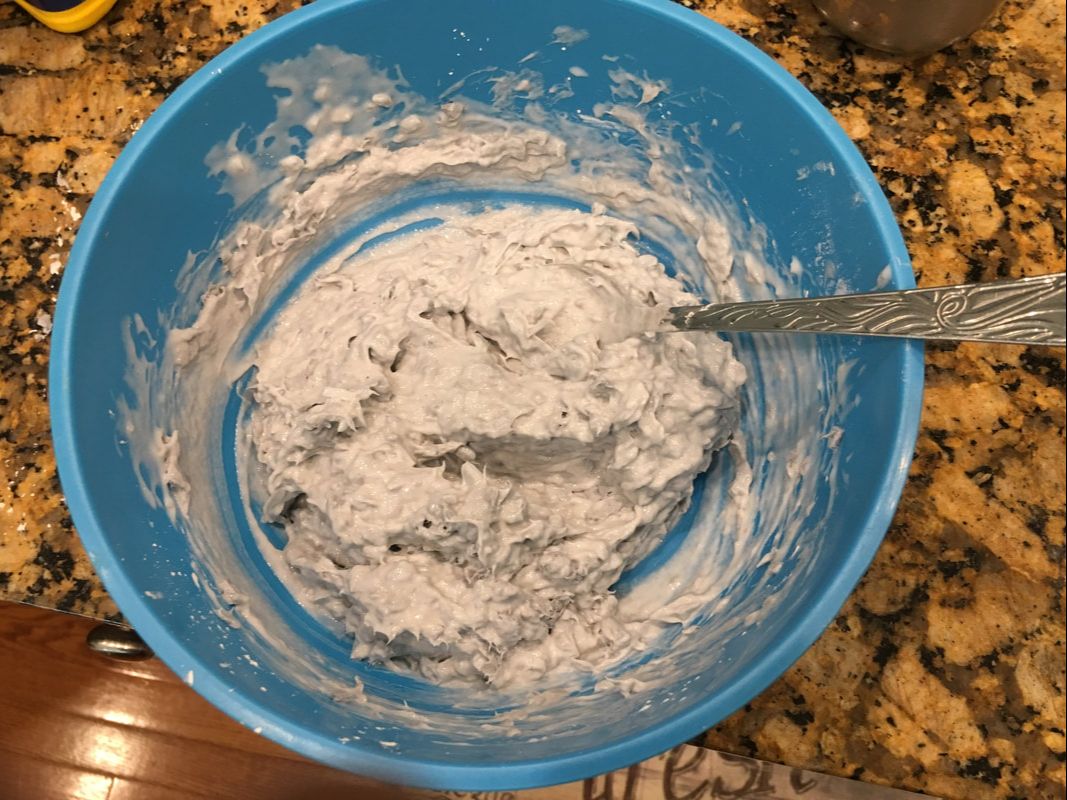
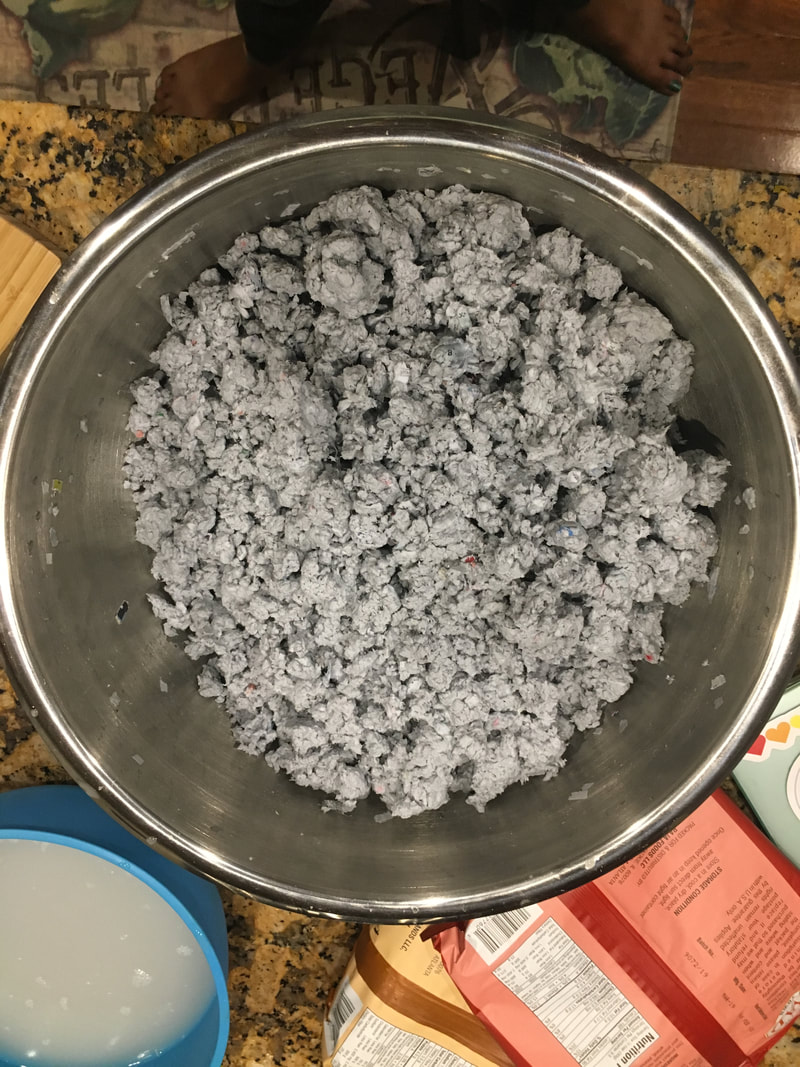
So, I started with soaking a new batch of paper shreds and I was going to try the same method of making paper clay as I did before India, but then I realized I would probably have a better chance with trying a whole new recipe altogether. I found this one from Tree Craft Studio online which uses glue, oil, salt, vinegar, baking powder, and cornstarch as opposed to just flour like the last recipe did. I started following the instructions until I realized that I didn't have enough glue, so I went out and bought some and then continued. I followed the instructions to a T and I'm still left with a drippy glue with bits of paper in it as opposed to a malleable clay. I don't know what to do! It feels like everybody on the internet is able to make paper clay but me :( I'm currently soaking more paper in hot water to blend and mix into my soupy glue (even though I already put in more than double of what was recommended), but I think I need to come up with a plan in case this whole paper clay thing doesn't end up working. Maybe I can try and make a simple shape out of wire mesh and try and coat it with previously mentioned soupy mixture and see if that holds. While this process has been really frustrating since its taken a lot of trial and error, I really enjoy sculpture so I kind of want to continue along these lines into the school year because I really want to see my original project idea come to creation. process pictures
youtube videoSo I was thinking about some other material I could use to do what I did with my drawing instead of using plain old markers, and I think doing linocuts could be really fun! They're a more "hands on" craft, which I know I like because of my experiences with sculpture, and it still ends up with a 2D result. It's also easier to make the colors denser because you're using paint, and linocuts leave a cooler rugged affect on the piece, which I really like. I did some googling and really liked this piece by Johnathan Thimpson, and I think it has a similar feel to my drawing (minus the fun colors).
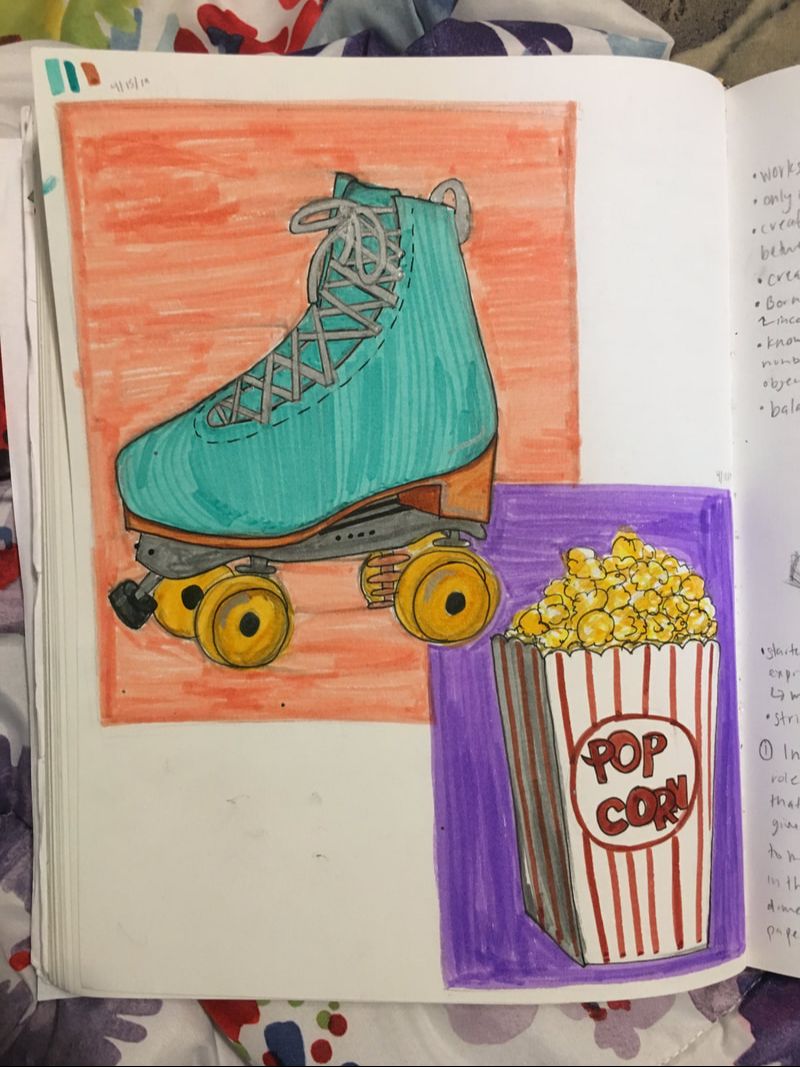
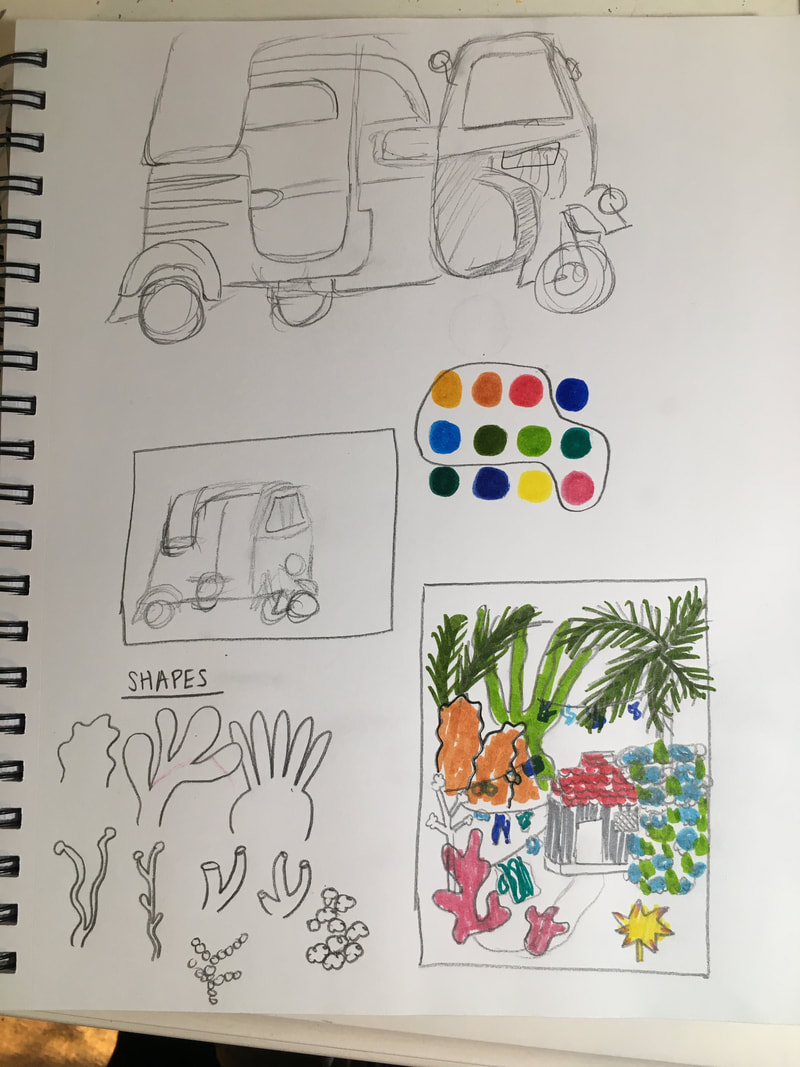
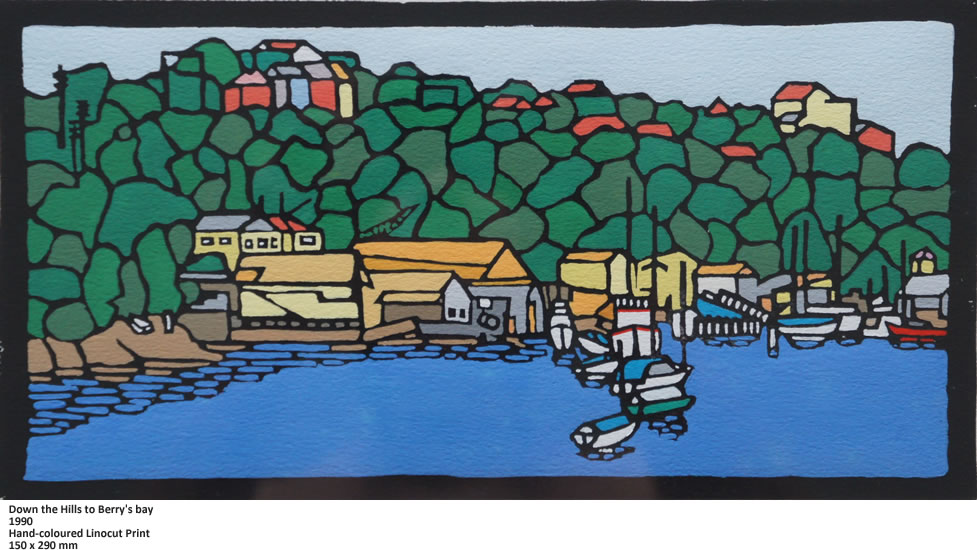 I think this piece has reached a conclusion. I'm fairly pleased with the way it turned out; it looks like what I wanted it to. I like how the black outlines on everything makes things pop. If I was to create this piece again, I would firstly draw much lighter on the final. I wasn't expecting the marker to be as transparent as it was, and even though I erased my pencil lines, they still showed through more than I though they would. When coloring, the darker colors were pretty opaque, but in the places I used the lighter markers stroke lines are pretty visible, which was to be expected. In the future I could maybe use paint on a canvas if I was doing something in the same stylized way. I do like how dynamic the piece is, and how there is negative space around the drawing as opposed to it filling up the entire page; it makes it less chaotic I think. I could have done a better job planning out what overlaps what because while coloring some of my guidelines weren't super clear, which resulted in some things overlapping in a way they shouldn't have, but overall I don't think it's too noticeable. Overall, I enjoyed creating this piece, but moving forward I think I'm going to explore other ways to add color to my pieces. Even though it did take me time to plan out and sketch, and I really did like incorporating organic shapes and block color into the piece, it feels too simple for me to make another piece in the same way.  I started on the drawing, and I realized that it's going to be way too boring to try and make the greenery actually green and resemble plants. Instead, I decided to have the organic shapes represent the flora in the images. In the thumbnails I was drawing I realized that I don't want the whole piece to just be a house nestled in the forest; I needed something to connect the mid ground to the background. So, I continued the clothesline into the background, which also kind of implies there are more houses just like the one depicted further into the background. I really like how the organic shapes look, and right now it just looks like a color blob, but I think after I add black outlines things are going to start looking more defined. I haven't decided if I want to vary the thickness of the black pen outline on different objects (thicker on things that are closer, thinner on things in the background) yet though. I don't think I will, firstly because even though things are in the front and in the back, everything is basically the same size, so I don't think it would make much sense. I also like the idea of this looking print-like, and so I think it would be best to keep things uniform. For my second summer assignment piece, I knew that I wanted to work with ink on paper. I've never made an actual full piece with these materials, but I had experimented with them in my daily drawings (see below). The way I like to use markers is to stylize the thing I'm drawing, and then color it with large blocks of color.
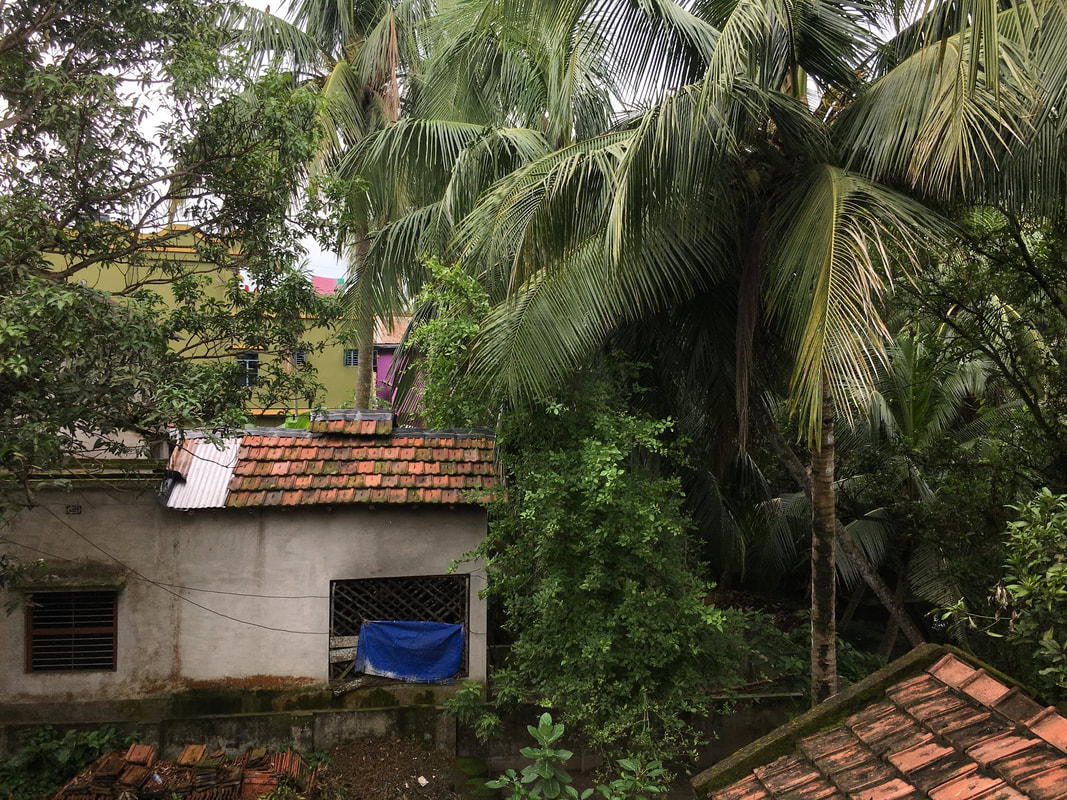
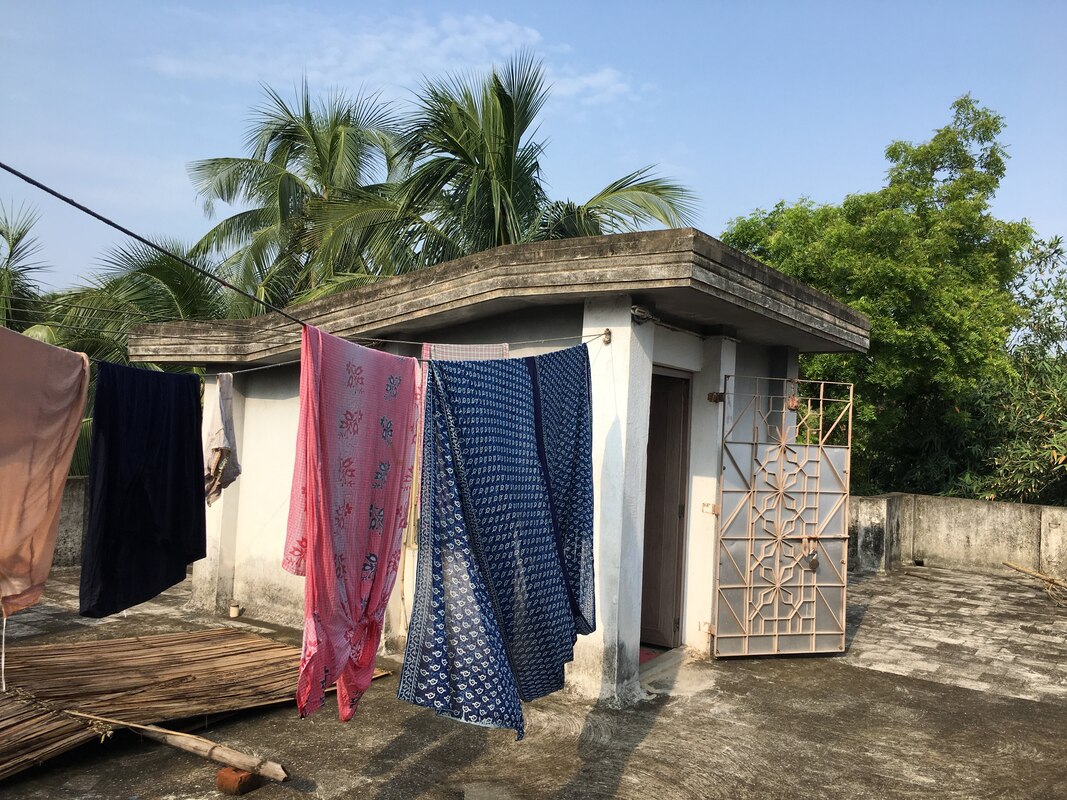
Since my sculpture is drawing from my experiences in Italy, I wanted my second piece to draw from my time in India. This India trip, I experienced a lot of my own culture and heritage in ways I hadn't before; enjoying food I used to dislike, meeting cousins I didn't know I had, and staying in the village for a week. Based on one of my Heart pieces from the Head and Heart project, I knew that I liked depicting nature scenes. When originally brainstorming, I was going to draw an auto rickshaw in front of a floral/ nature background, which you can see in my sketches, but I quickly found that it didn't feel right because it felt too much like I was trying to draw a clean silhouette. I looked through my google photos and found these two pictures from the village I stayed in. The greenery and simplicity of the house stood out to me and I decided I wanted to depict that in my own stylized way instead (as opposed to drawing from life like in my daily drawings).
Okay so! I'm not going to call my first attempt a fail because I did learn about how the paper clay works (and smells), which will help me make the next try better. After making my first testing batch, I filled a large bowl with paper shreds and used hot water to soak it. After a few days, I started the clay making process. I think because I was working with a much larger amount of paper than before, I ended up using a lot more flour than I was supposed to. It gave the clay a more workable consistency, but I think that is what made the clay smell SO BAD as it dried, which didn't happen the first time. As I began building the piece, I quickly realized that the "clay" wasn't nearly as study as I expected it to be. I was using more of a slab building technique, but since the clay couldn't support itself, I tried using stacked pots and pans to support the walls. It seemed to work at first, but as it dried overnight it fell apart. So, improvements! First of all, next time instead of making a huge batch of clay I'm going to make several smaller batches of clay, both to save my forearms from all that kneading and to keep the ratio of paper to flour more even (around 3:1). I'm also going to scale the piece down, because I want to make it more dense (aka no more slab like pieces), so scaling it down will make shaping the pieces by hand easier. I think it'll also help the arches be more successful and make it easier for the piece to support itself. If the piece ends up falling apart a second time, I could experiment with having a metal mesh/wire armature supporting the piece (as opposed to pots and pans) which I just keep attached as a part of the piece, but I really wanted the piece to just be the clay so I'm going to try one more time. Since I'm in India now and don't have the materials I need to continue the sculpture right now, I'm going to switch gears and take a break from the sculpture and get started on my 2D piece. Brainstorm and thumbnail post coming soon! sculpting
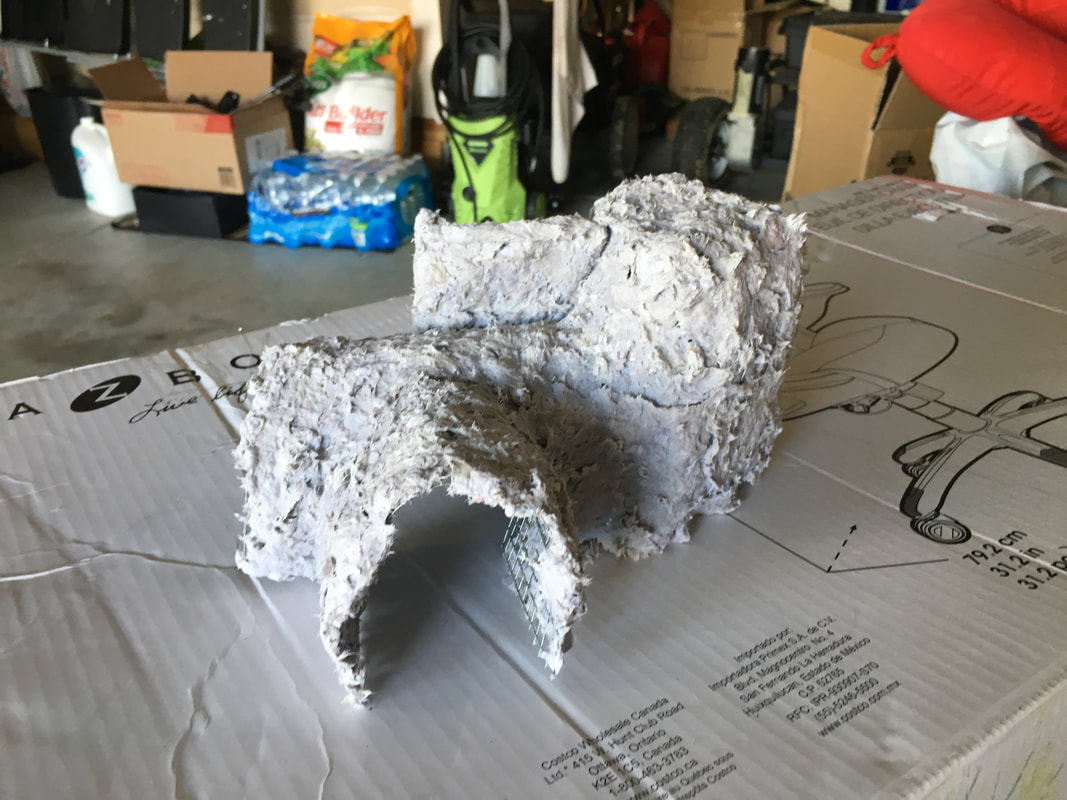
post-drying
|
Ria BakshiCheck out what I'm currently working on by clicking the PROCESS button! Archives
December 2020
Categories |


 RSS Feed
